We have decided to add Lynn Seddon’s Exploring Nature with Children to our homeschooling curriculum this year. Living in Canada, we will probably have to add 4 more weeks of winter ideas to make it work for us.
While most people would simply purchase a notebook we had a couple of rainy days so we decided to make our own Nature Journals. I gave the kids each
3 pieces of regular bond paper,
2 pieces of watercolor paper, and
2 pieces of white cardstock
The paper is 8 ½” x 11” other than the watercolor paper which is slightly larger than the other paper (but that doesn’t bother me at all). The reason for the different paper types is to provide us with many different options. We can glue samples onto the cardstock, we can paint on the watercolor paper and draw or write on the bond paper.
I had the kids fold their paper in half.
(Sorry there are no step-by-step photos here but sometimes it's best to be completely immersed in a project with your kids.)
Using a ruler, I measured 1 ¼” from the edge (along the fold mark) and marked ever 1” interval leaving another 1 ¼” on the other side. There are now 7 dots along the fold line.
Using a heavy-duty, sharp needle (I think it might be a darning needle), I poked a hole where each dot was marked. Then I used the template paper I just made to punch holes with the needle through the other papers too. For the watercolor paper, I centered the bond paper over the watercolor paper and punched holes.
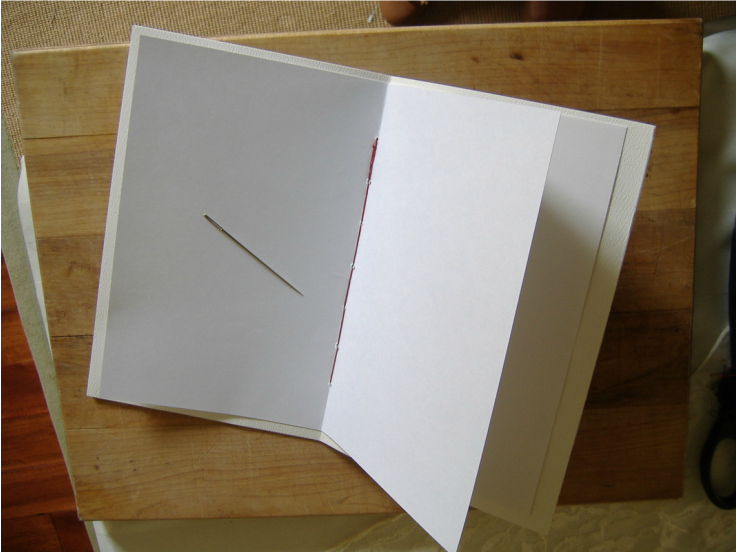
I layered the paper as follows 1 sheet cardstock, 1 sheet bond, 1 sheet watercolor paper, 1 sheet bond, 1 sheet watercolor paper, 1 sheet bond, 1 sheet cardstock.
Now I sewed up my booklet. I used approximately 36” of crochet cotton and threaded my needle, making sure the thread was doubled. I began with the inside of the booklet facing me and carefully poked the needle through each layer of paper, making sure to go through the guide holes at the top of the paper. (I worked over a wooden cutting board so that I could lever the needle through the paper more easily.) Now that my needle was on the outside of the booklet I pulled the cotton through until about 3” remained inside. Then I threaded through the next hole going from out to in. I kept sewing until I reached the bottom of the page then I worked back up to the top. This caused every empty space between the holes to have a strand of cotton crossing it both inside and outside the booklet.
Once I got to the second-from-the-top hole, I was inside the booklet again. I now tied a double knot and then cut the ends.
Using a heavy-duty, sharp needle (I think it might be a darning needle), I poked a hole where each dot was marked. Then I used the template paper I just made to punch holes with the needle through the other papers too. For the watercolor paper, I centered the bond paper over the watercolor paper and punched holes.
I layered the paper as follows 1 sheet cardstock, 1 sheet bond, 1 sheet watercolor paper, 1 sheet bond, 1 sheet watercolor paper, 1 sheet bond, 1 sheet cardstock.
Now I sewed up my booklet. I used approximately 36” of crochet cotton and threaded my needle, making sure the thread was doubled. I began with the inside of the booklet facing me and carefully poked the needle through each layer of paper, making sure to go through the guide holes at the top of the paper. (I worked over a wooden cutting board so that I could lever the needle through the paper more easily.) Now that my needle was on the outside of the booklet I pulled the cotton through until about 3” remained inside. Then I threaded through the next hole going from out to in. I kept sewing until I reached the bottom of the page then I worked back up to the top. This caused every empty space between the holes to have a strand of cotton crossing it both inside and outside the booklet.
Once I got to the second-from-the-top hole, I was inside the booklet again. I now tied a double knot and then cut the ends.
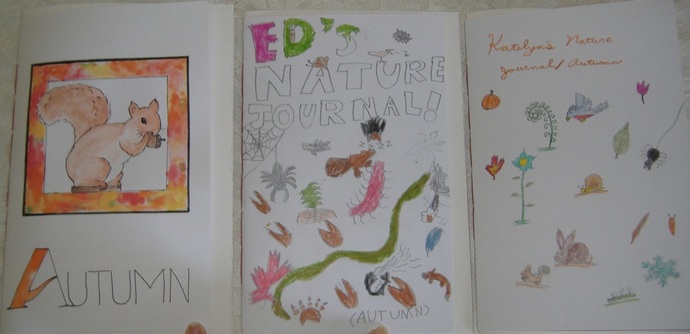
The kids got to decorate their front page. We also wrote “Autumn” to remind us which season we have been exploring.
We plan on using 2 pages a week, 4 weeks a month so this booklet will work for the autumn. In winter we will make a similar one and another in spring and summer. Then we will stitch the 4 booklets together and give it a cover.
We plan on using 2 pages a week, 4 weeks a month so this booklet will work for the autumn. In winter we will make a similar one and another in spring and summer. Then we will stitch the 4 booklets together and give it a cover.
 RSS Feed
